Playing Android with Firebase ML kit, Tensorflow Lite and ARCore 1
CameraX, TFLite and Firebase ML kit
Today, I would like to introduce combination of Tensorflow Lite, Firebase ML kit, ARCore on Android with CameraX.
Using smartphone camera as a visual device to interact with the real world has becoming ever popular with utilization of deep learning and augmented reality as a tool. There is no doubt that Tensorflow Lite, the Tensorflow implementation for smartphone devices, including Android and iOS, is one of the most practical library to run inference in the devices. Running inference int the device, however, is not only thing you have to deal with for the device-side inference. You at least have to consider updating the model. Firebase ML kit, now in Beta, provides utility to distribute the model. On the other hand, just running inference is a way to predict what you can see, which is not fun enough. To have more funny side of technology, we can start playing around with augmented reality with ARCore.
I am going through the code of a simple application I made for Android. You can find the whole source code in the repository:
Since the whole source code contains hundreds of lines, I am going to explain some important potions.
CameraX
The CameraX has been released last year to ease usage of camera API for Android application. Some good points of the CameraX, compared to the previous Camera2, are that the CameraX supports image analysis as a default to use ML or vision analysis in a simple code base.
Previewing camera image on the smartphone takes only this amount of line:
AndroidManifest.xml
<uses-permission android:name="android.permission.CAMERA" />build.gradle
implementation 'androidx.camera:camera-core:1.0.0-alpha02'
implementation 'androidx.camera:camera-camera2:1.0.0-alpha02'
activity_ml.xml
<?xml version="1.0" encoding="utf-8"?>
<androidx.constraintlayout.widget.ConstraintLayout xmlns:android="http://schemas.android.com/apk/res/android"
    xmlns:app="http://schemas.android.com/apk/res-auto"
    xmlns:tools="http://schemas.android.com/tools"
    android:layout_width="match_parent"
    android:layout_height="match_parent"
    android:background="@color/colorPrimary"
    tools:context=".MLActivity">

    <TextureView
       android:id="@+id/cameraTextureView"
       android:layout_width="match_parent"
       android:layout_height="match_parent"/>

</androidx.constraintlayout.widget.ConstraintLayout>
MLActivity.kt
class MainActivity : AppCompatActivity() {
    private lateinit var cameraTextureView: TextureView
    override fun onCreate(savedInstanceState: Bundle?) {
        super.onCreate(savedInstanceState)        setContentView(R.layout.activity_ml)
        cameraTextureView = findViewById(R.id.cameraTextureView)

        cameraTextureView.post { startCameraX() }
        cameraTextureView.addOnLayoutChangeListener { _, _, _, _, _, _, _, _, _ ->
            updateTransform()
        }
    }private fun startCameraX() {
        val previewConfig = PreviewConfig.Builder().apply {
            setTargetAspectRatio(Rational(1, 1))
            setTargetResolution(Size(cameraTextureView.width, cameraTextureView.height))
        }.build()

        val preview = Preview(previewConfig)
        preview.setOnPreviewOutputUpdateListener {
            parent.removeView(cameraTextureView)
            parent.addView(cameraTextureView, 0)
            cameraTextureView.surfaceTexture = it.surfaceTexture
            updateTransform()
        }
        val imageAnalysis = ImageAnalysis(analyzerConfig)
        imageAnalysis.analyzer = ImageAnalysis.Analyzer {
               image: ImageProxy, rotationDegrees: Int ->
                 mlImageAnalysis(image, rotationDegrees)
        }        CameraX.bindToLifecycle(this, preview, imageAnalysis)
    }    private fun buildAnalyzerConfig(): ImageAnalysisConfig {
        return ImageAnalysisConfig.Builder().apply {
            val analyzerThread = HandlerThread("AnalysisThread").apply {
                start()
            }
            setCallbackHandler(Handler(analyzerThread.looper))
      setImageReaderMode(ImageAnalysis.ImageReaderMode.ACQUIRE_LATEST_IMAGE)
        }.build()
    }
    private fun updateTransform() {
        val matrix = Matrix()

        val centerX = cameraTextureView.width / 2f
        val centerY = cameraTextureView.height / 2f

        val rotationDegrees = when (cameraTextureView.display.rotation) {
            Surface.ROTATION_0 -> 0
            Surface.ROTATION_90 -> 90
            Surface.ROTATION_180 -> 180
            Surface.ROTATION_270 -> 270
            else -> return
        }
        matrix.postRotate(-rotationDegrees.toFloat(), centerX, centerY)

        cameraTextureView.setTransform(matrix)
    }
}
This is quite a lot fewer than using the Camera2 API. To execute machine learning inference, you can write it in this code block. Here, I made a fun mlImageAnalysis() to classify camera image.
val imageAnalysis = ImageAnalysis(analyzerConfig)
imageAnalysis.analyzer = ImageAnalysis.Analyzer {
        image: ImageProxy, rotationDegrees: Int ->
            mlImageAnalysis(image, rotationDegrees)
        }
Refer here for more precise usage of the CameraX with ML inference.
How do you run the inference in Android?
There are several options to run machine learning model in Android: Tensorflow Lite, Pytorch mobile, DL4J or something. Probably the most famous tool is the Tensorflow Lite, or TFLite, at this moment. You can find various examples of TFLite in the official website.
Here, I would like to use the TFLite model with a combination of Firebase ML kit.
Prerequisite
In order to use Firebase ML kit, you need your Firebase project. For this portion, please refer below to make your account and project, including Android Studio installation and google-services.json configuration.
Start using Firebase ML kit
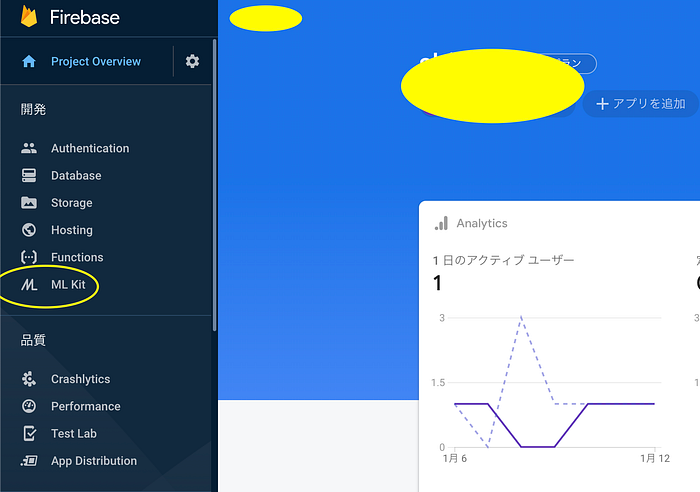
Once you are ready with your Firebase project, you are also ready to use ML kit. Open the Firebase project console and you can find the ML kit in the left window.
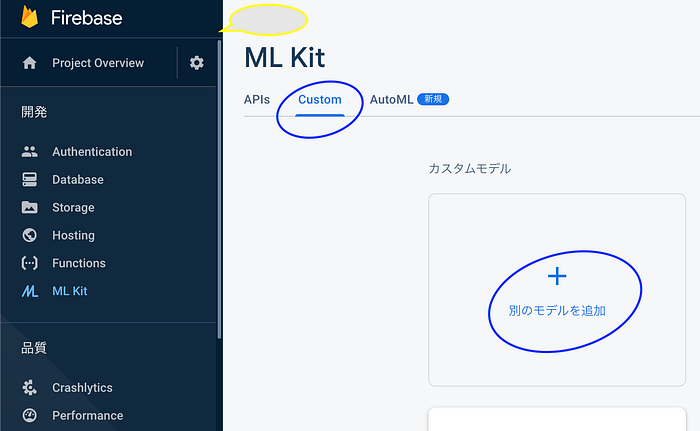
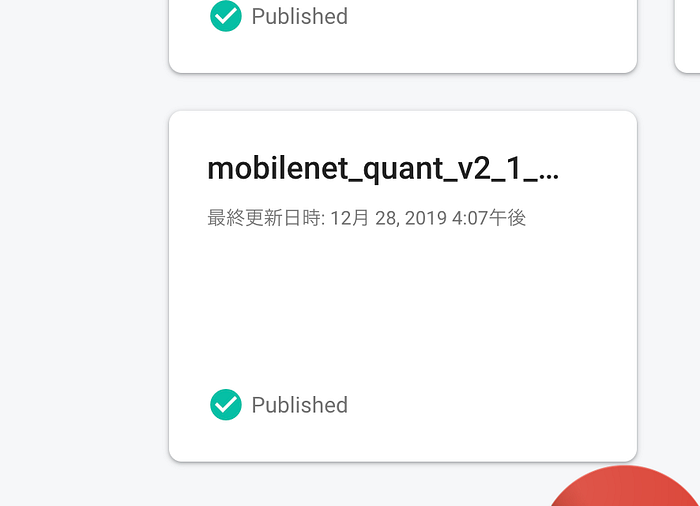
There are plenty of functions you can do with the ML kit. Refer here for them. Right now, I would like to run ImageNet trained MobileNetV2, already quantized, that you can acquire from this link with the labels. Once downloaded, extract and upload the .tflite file to the custom model, with the name mobilenet_quant_v2_1_0_299_tflite.
Once the model is uploaded, you are ready to use in the Android application.
In your application, you can download and build the model file with for inference.
AndroidManifest.xml
<meta-data
    android:name="com.google.firebase.ml.vision.DEPENDENCIES"
    android:value="barcode,face,ocr,ica,label" />
build.gradle
implementation 'com.google.firebase:firebase-ml-model-interpreter:22.0.1'
implementation 'com.google.firebase:firebase-ml-vision-object-detection-model:19.0.3'
implementation 'com.google.firebase:firebase-ml-vision-image-label-model:19.0.0'
implementation 'com.google.firebase:firebase-ml-vision:24.0.1'
ImageClassifier.kt
private fun initializeModel(){
    val remoteModel = FirebaseCustomRemoteModel.Builder(remoteModelName).build()
    val firebaseModelManager = FirebaseModelManager.getInstance()

    firebaseModelManager
        .isModelDownloaded(remoteModel)
        .continueWithTask { task ->
            val conditions =
                if (task.result != null && task.result == true) {
                    FirebaseModelDownloadConditions
                        .Builder()
                        .requireWifi()
                        .build()
                }
                else {
                    FirebaseModelDownloadConditions
                        .Builder()
                        .build()
                }
            firebaseModelManager.download(remoteModel, conditions)
        }
        .addOnSuccessListener {
            try {
                val interpreterOptions =
                    FirebaseModelInterpreterOptions
                        .Builder(
                            FirebaseCustomRemoteModel
                                .Builder(remoteModelName)
                                .build()
                        ).build()
                interpreter = FirebaseModelInterpreter.getInstance(interpreterOptions)
            } catch (ex: FirebaseMLException) {
                ex.printStackTrace()
            }
        }
        .addOnFailureListener { ex ->
            ex.printStackTrace()
        }
    Log.d(TAG, "Created a Custom Image Classifier.")
}
How do you run the inference? First you have to define input and output data dimension. Since the model is quantized, the data should be in Byte type, with the input of 1 * 299 * 299 dimension and output of 1 * 1001, the number of labels for the ImageNet.
The input interface of Firebase ML kit API is FirebaseModelInputs form, and it needs to be built according to the input data, converting bitmap to buffer to FirebaseModelInputs.
ImageClassifier.kt
private fun initializeIO(){
    val inputDims = intArrayOf(dimBatchSize,
        dimImgSize,
        dimImgSize,
        dimPixelSize)
    val outputDims = intArrayOf(1,
        labelList.size)

    val dataType = if (quantized)
        FirebaseModelDataType.BYTE
    else
        FirebaseModelDataType.FLOAT32

    dataOptions = FirebaseModelInputOutputOptions
        .Builder()
        .setInputFormat(0, dataType, inputDims)
        .setOutputFormat(0, dataType, outputDims)
        .build()
    Log.d(TAG, "Configured input & output data for the custom image classifier.")
}

@Synchronized
private fun convertBitmapToResizedinBuffer(bitmap: Bitmap): ByteBuffer {
    return ImageUtils.convertBitmapToResizedinBuffer(
        bitmap,
        numOfBytesPerChannel,
        dimBatchSize,
        dimPixelSize,
        dimImgSize,
        quantized,
        127.5f,
        127.5f)
}

private fun generateClassificationInputs(image: Bitmap):FirebaseModelInputs{
    return FirebaseModelInputs
        .Builder()
        .add(convertBitmapToResizedinBuffer(image))
        .build()
}
You can use the FirebaseModelInputs data as input for the run method of the model interpreter. The run method is executed as asynchronous. To acquire the inference result, you have to get it with successListener , like the official example does, or Tasks.await() to be synchronous with the inference.
ImageClassifier.kt
@Throws(FirebaseMLException::class)
internal fun classify(image: Bitmap): Task<FirebaseModelOutputs> {
    if (!initialized || interpreter==null) {
        initialize()
    }
    return interpreter!!.run(generateClassificationInputs(image), dataOptions)
}

@Throws(FirebaseMLException::class)
internal fun classifyAwait(image: Bitmap,
                           awaitMilliSeconds: Long=this.awaitMilliSeconds): FirebaseModelOutputs? {
    if (!initialized || interpreter==null) {
        initialize()
    }
    try{
        return Tasks.await(classify(image),
            awaitMilliSeconds,
            TimeUnit.MILLISECONDS)
    }
    catch (ex: Exception){
        Log.e(TAG, "${ex.printStackTrace()}")
        return null
    }
}
The result will be in FirebaseModelOutputs form, and you can extract the classifications with firebaseModelOutputs.getOutput<Array<ByteArray>>(0) . The example uses PriorityQueue to sort the result based on probability of each class.
ImageClassifier.kt
private val sortedLabels = PriorityQueue(
    resultsToShow,
    Comparator<AbstractMap.SimpleEntry<String, Float>> { o1, o2 ->
        o1.value.compareTo(o2.value) })

/**
 * Gets the top-K labels, to be shown in UI as the results.
 */
private val topKLabels: List<String>
    @Synchronized get() {
        val result = ArrayList<String>()
        val size = sortedLabels.size
        for (i in 0 until size) {
            val label = sortedLabels.poll()
            result.add("${label.key}:\t${adjustStringLength(label.value.toString(),7,"0")}")
        }
        return result.reversed()
    }

private fun adjustStringLength(str: String,
                               max: Int,
                               fill: String = "0"): String =
    if (str.length >= max) str.substring(0, max) else str + fill.repeat(max - str.length)@Synchronized
internal fun getTopLabels(labelProbArray: Array<ByteArray>): List<String> {
    for (i in labelList.indices) {
        sortedLabels.add(
            AbstractMap.SimpleEntry(
                labelList[i],
                (labelProbArray[0][i] and 0xff.toByte()) / 255.0f
            )
        )
        if (sortedLabels.size > resultsToShow) {
            sortedLabels.poll()
        }
    }
    return topKLabels
}
The classifier can be called from the ImageAnalysis.Analyzer in the CameraX API. A cool thing about the CameraX ImageAnalysis is that it can run in worker thread and can be bound to the camera lifecycle, making it easy to code with less lines.
MLActivity.kt
val imageAnalysis = ImageAnalysis(analyzerConfig)
        imageAnalysis.analyzer = ImageAnalysis.Analyzer {
               image: ImageProxy, rotationDegrees: Int ->
                 classification(image, rotationDegrees)
        }CameraX.bindToLifecycle(this, preview, imageAnalysis)
MLProcessor.kt
fun classify(image: ImageProxy,
             overlay: GraphicOverlay){
    val list = mutableListOf<BoxData>()
    classifierInterpreter!!
        .classify(image)
        .addOnSuccessListener {
            Log.i(TAG, "${it}")
            val results = classifierInterpreter!!
                .extractResults(it)
            Log.i(TAG, "Classified: ${results}.")
            list.add(
                BoxData(results,
                    Rect(100,10,200,20)
                )
            )
            overlay.set(list)
        }.addOnFailureListener {ex ->
            Log.e(TAG, "Failed on Classifier: ${ex}")
        }
}

fun classifyAwait(image: ImageProxy,
                  overlay: GraphicOverlay){

    val classified = classifierInterpreter!!
        .classifyAwait(image)
    if(classified == null){
        return
    }

    val list = mutableListOf<BoxData>()
    val results = classifierInterpreter!!
        .extractResults(classified!!)
    list.add(BoxData(results, Rect(100,10,200,20)))
    Log.i(TAG, "Classified: ${results}.")
    overlay.set(list)
}
Now you have the results, to visualize the top labels, I used GraphicOverlay to show in the camera screen.
Non-quantized model?
While we used a quantized model, it is also easy to utilize a non-quantized TFLite model. For the ImageNet pretrained models, we can find in the Tensorflow’s official website.
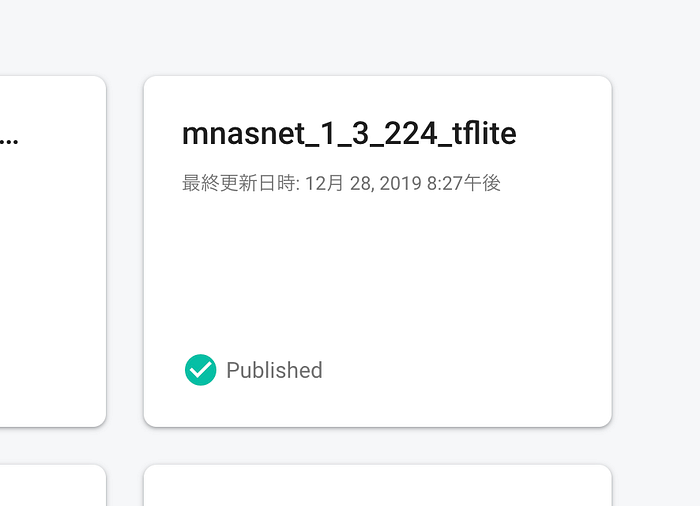
This time, I would like to try with MNASnet, tuned with Cloud AutoML, as another example. You can download the model from this URL. The .tgz contains protobuf and tflite files. To see the structure of the model, you can upload the protobuf to netron to visualize the neural network.
Once downloaded the model, upload to the Firebase ML kit custom model again.
Running the floating-point model or quantized model does not change the code so much. Just specifying the data type will do.
ImageClassifier.kt
val dataType = if (quantized)
FirebaseModelDataType.BYTE
else
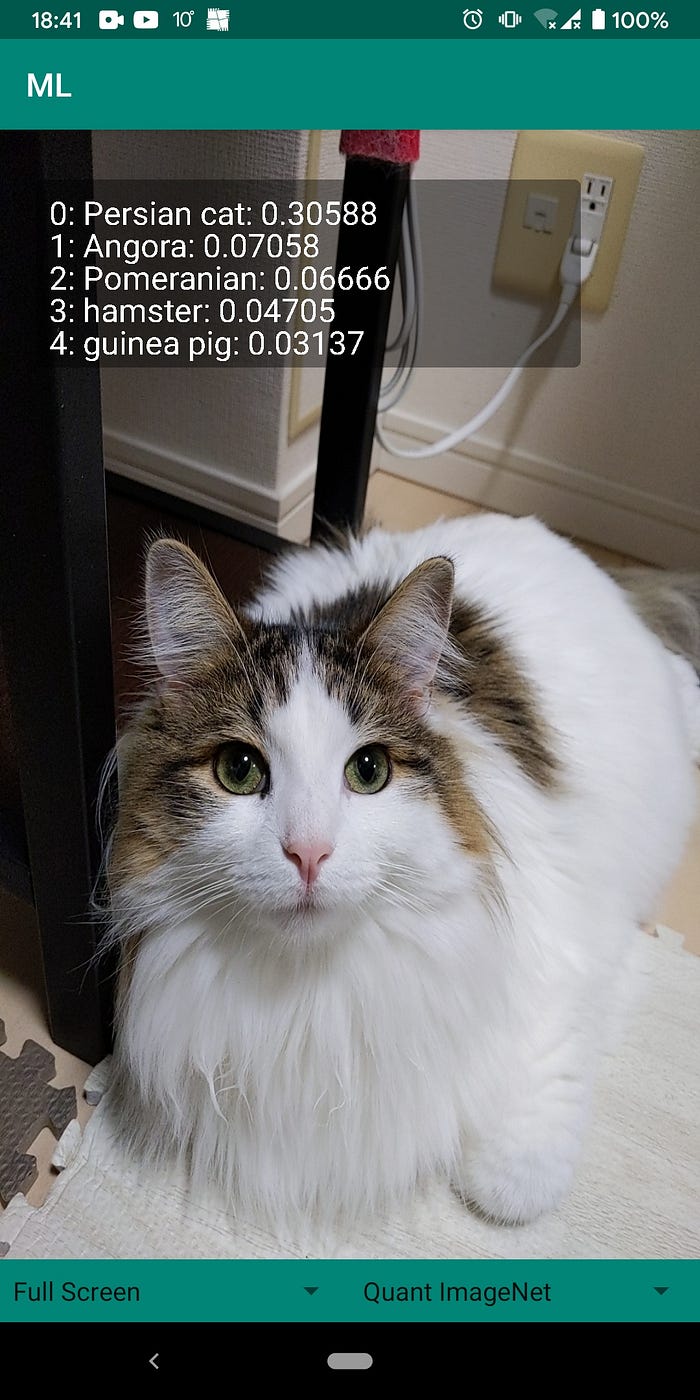
FirebaseModelDataType.FLOAT32So, how is the classification different?
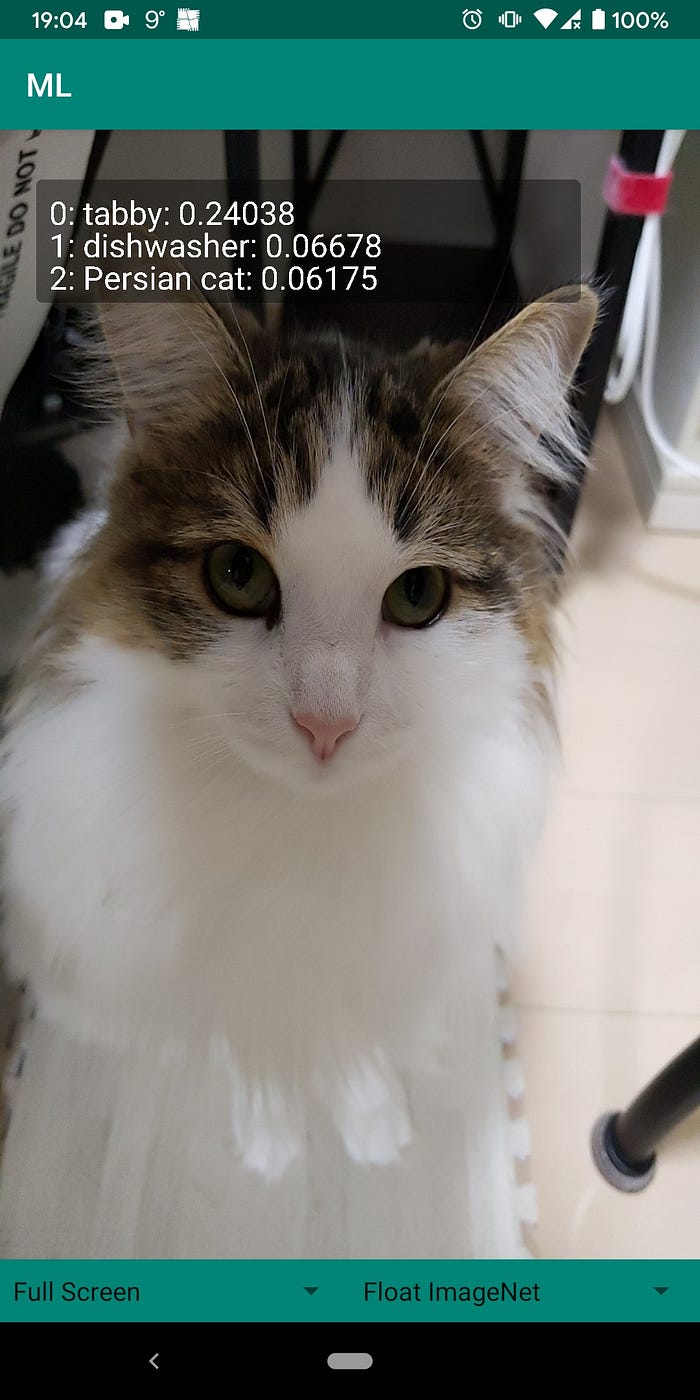
The UI looks like this, with video on Youtube:
What’s next?
Now we have succeeded in running TFLite model with Firebase ML kit on CameraX. Next, I would like to go through combining multiple ML models: object detection and image classification.
Playing Android with Firebase ML kit, Tensorflow Lite and ARCore 2
You can find the whole code of this AI and AR toy in the repository.